Configure DHCP IPv4 on Cisco Layer 3 Switch or Multilayer Switch
In this post, we’ll walk you through the steps to configure DHCP IPv4 on a Cisco Layer 3 switch or multilayer switch. We’ll use the provided network topology to demonstrate the process.
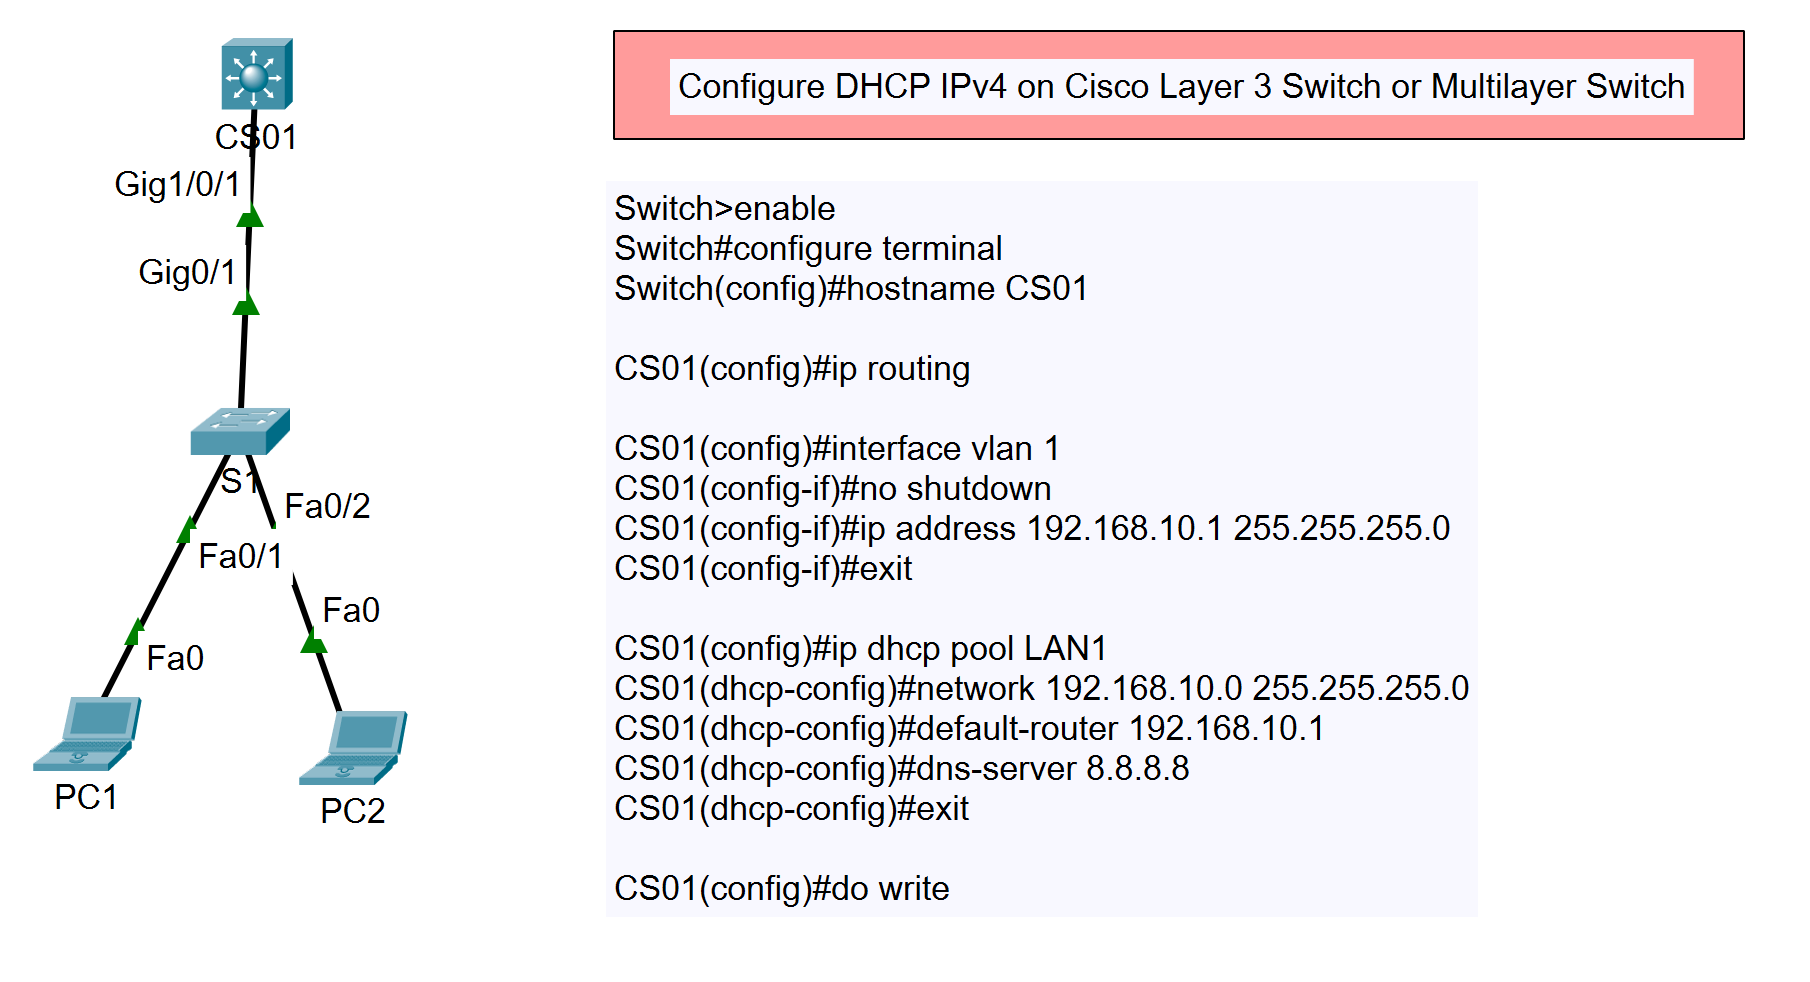
Network Topology Overview
The network topology consists of the following components:
- CS01: A Cisco Layer 3 switch configured with DHCP IPv4.
- S1: A standard switch connected to the Layer 3 switch.
- PC1 and PC2: End devices connected to the switch, which will receive IP addresses from the DHCP server on CS01.
Type of DHCP IPv4
- DHCP IPv4 on Cisco Router
- DHCP IPv4 on Cisco Layer 3 Switch or Multilayer Switch
- DHCP IPv4 on Cisco Router with 2 Networks
- DHCP IPv4 on Cisco Layer 3 Switch or Multilayer Switch with 2 VLANs
Step-by-Step Configuration
1. Access the Switch
First, access your switch by connecting through the console port and entering privileged EXEC mode.
Switch>enable
2. Enter Global Configuration Mode
Enter global configuration mode to begin setting up the switch.
Switch#configure terminal
3. Set the Hostname
Set a hostname for the switch for easier identification.
Switch(config)#hostname CS01
4. Enable IP Routing
Enable IP routing on the switch to allow it to perform Layer 3 functions.
CS01(config)#ip routing
5. Configure the VLAN Interface
Configure the VLAN 1 interface, assign an IP address, and bring it up.
CS01(config)#interface vlan 1
CS01(config-if)#no shutdown
CS01(config-if)#ip address 192.168.10.1 255.255.255.0
CS01(config-if)#exit
6. Configure the DHCP Pool
Create and configure a DHCP pool for the network.
CS01(config)#ip dhcp pool LAN1
CS01(dhcp-config)#network 192.168.10.0 255.255.255.0
CS01(dhcp-config)#default-router 192.168.10.1
CS01(dhcp-config)#dns-server 8.8.8.8
CS01(dhcp-config)#exit
7. Save the Configuration
Save the running configuration to the startup configuration to ensure the changes are retained after a reboot.
CS01(config)#do write
Verification
To verify that the DHCP server is working correctly, connect a device to the network and check if it receives an IP address from the DHCP pool. You can also use the following command to view the DHCP bindings:
CS01#show ip dhcp binding
Conclusion
By following these steps, you have successfully configured DHCP IPv4 on a Cisco Layer 3 switch or multilayer switch. This setup will allow devices on the network to automatically receive IP addresses, simplifying network management and configuration.

