Configure DHCP IPv4 on Cisco Router with 2 Networks
In this tutorial, we will configure DHCP IPv4 on a Cisco router for two different networks. This setup is useful for managing IP address allocation dynamically within separate network segments.
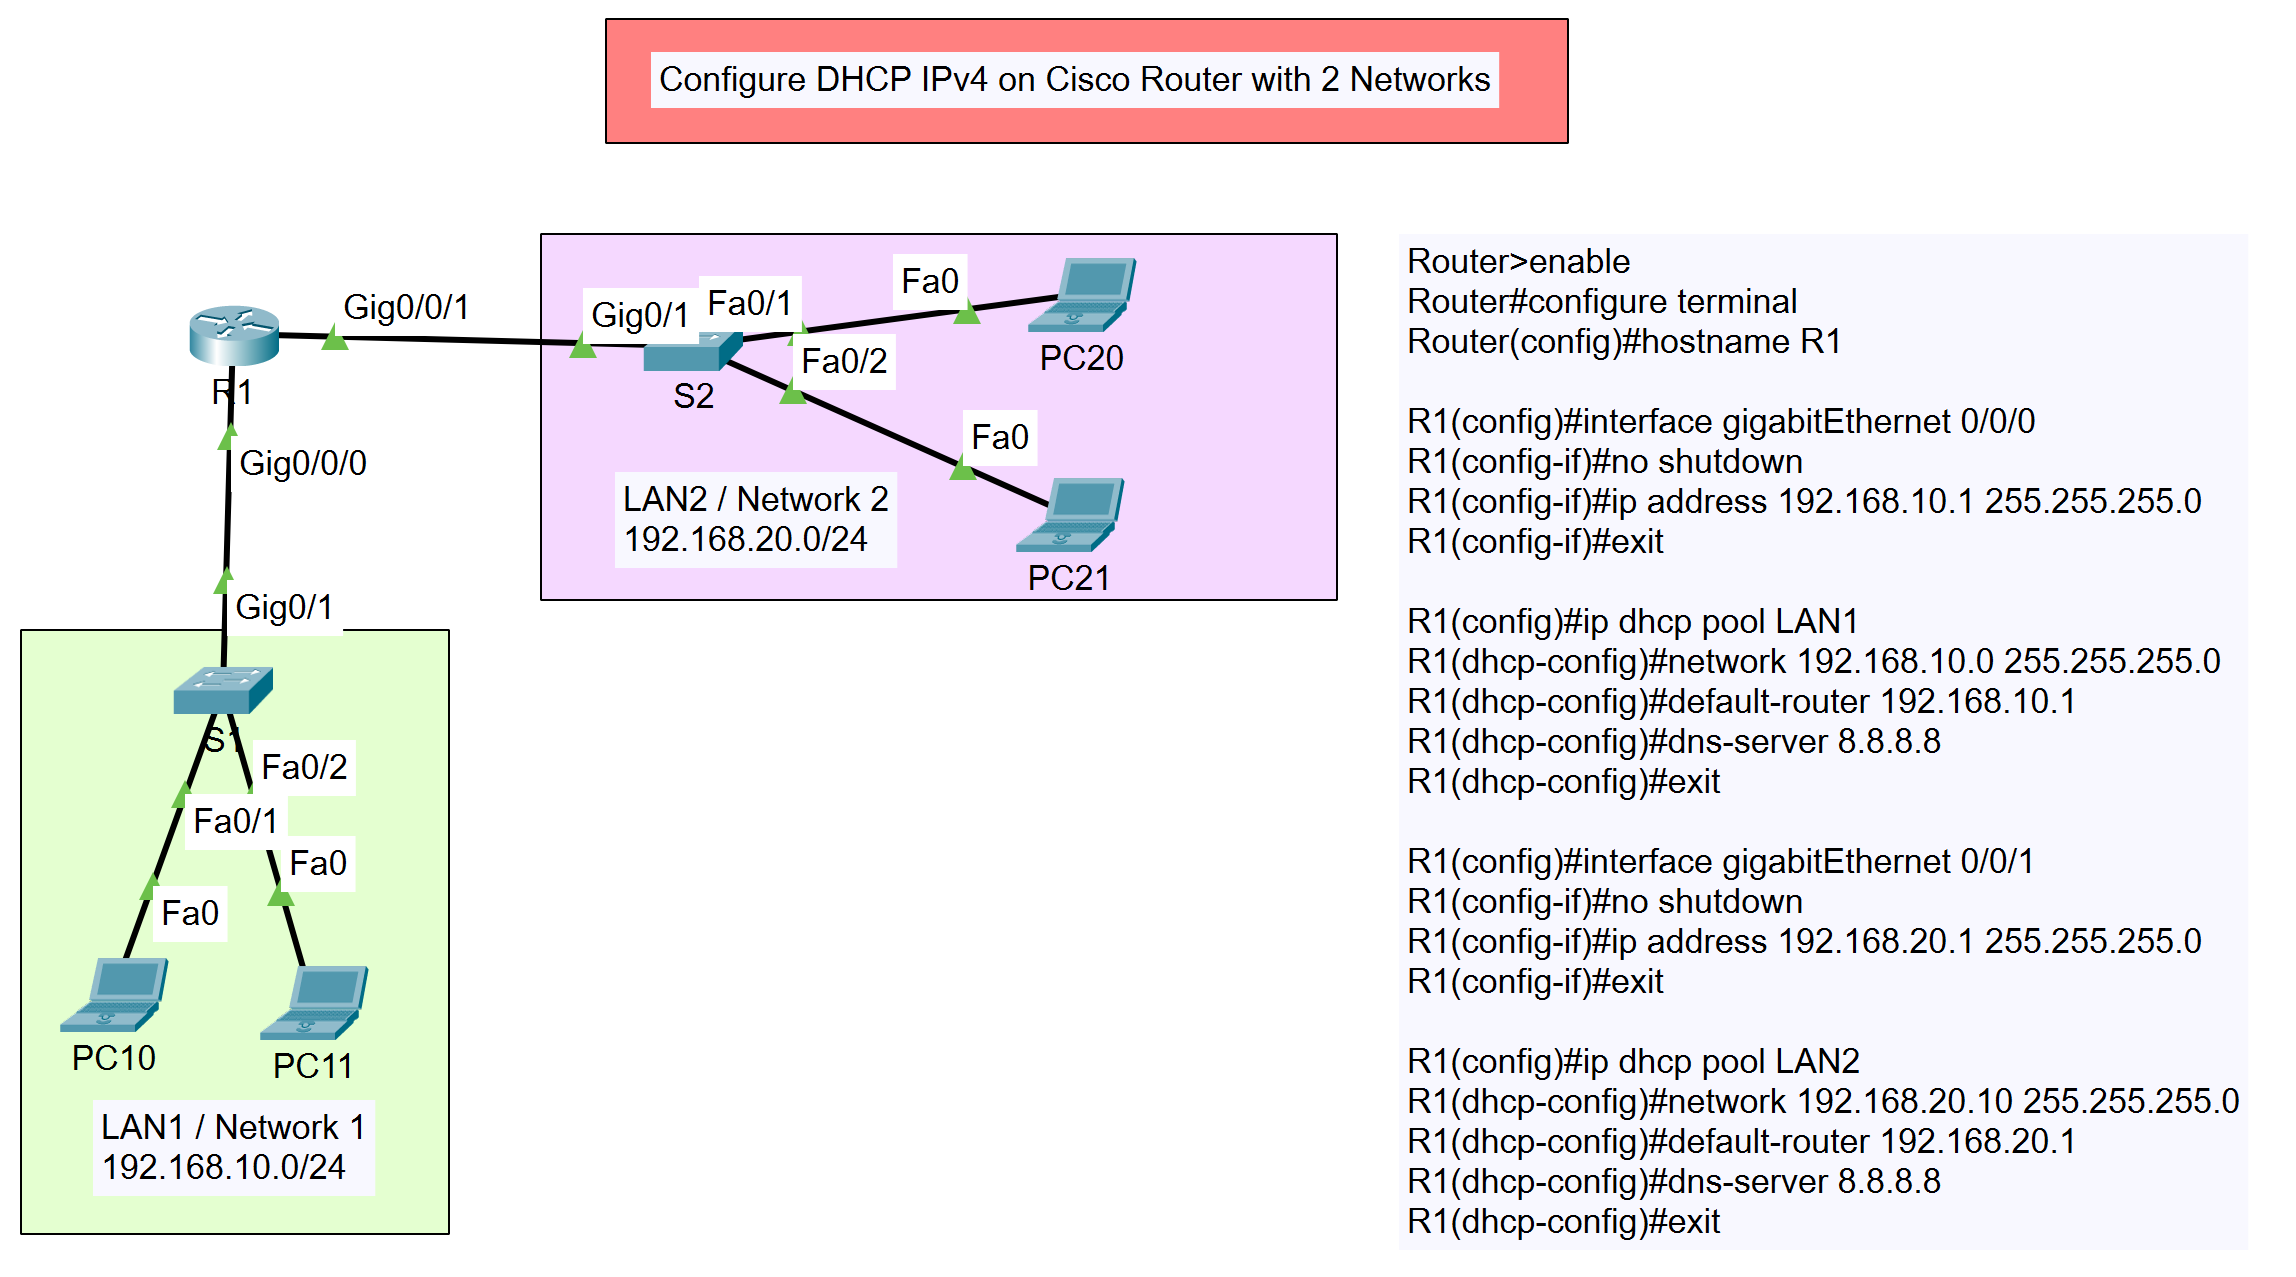
Topology Overview
The topology consists of a router connected to two different switches, each serving its own network segment:
- LAN1 (Network 1): 192.168.10.0/24
- LAN2 (Network 2): 192.168.20.0/24
Each LAN is connected to its respective PCs as shown in the diagram.
Type of DHCP IPv4
- DHCP IPv4 on Cisco Router
- DHCP IPv4 on Cisco Layer 3 Switch or Multilayer Switch
- DHCP IPv4 on Cisco Router with 2 Networks
- DHCP IPv4 on Cisco Layer 3 Switch or Multilayer Switch with 2 VLANs
Configuration Steps
Follow these steps to configure DHCP IPv4 on the Cisco router for both networks:
- Access the Router:
Router>enable
Router#configure terminal
- Set Hostname:
Router(config)#hostname R1
- Configure GigabitEthernet Interfaces:For LAN1:
R1(config)#interface gigabitEthernet 0/0/0
R1(config-if)#no shutdown
R1(config-if)#ip address 192.168.10.1 255.255.255.0
R1(config-if)#exit
For LAN2:
R1(config)#interface gigabitEthernet 0/0/1
R1(config-if)#no shutdown
R1(config-if)#ip address 192.168.20.1 255.255.255.0
R1(config-if)#exit
- Configure DHCP Pools:For LAN1:
R1(config)#ip dhcp pool LAN1
R1(dhcp-config)#network 192.168.10.0 255.255.255.0
R1(dhcp-config)#default-router 192.168.10.1
R1(dhcp-config)#dns-server 8.8.8.8
R1(dhcp-config)#exit
For LAN2:
R1(config)#ip dhcp pool LAN2
R1(dhcp-config)#network 192.168.20.0 255.255.255.0
R1(dhcp-config)#default-router 192.168.20.1
R1(dhcp-config)#dns-server 8.8.8.8
R1(dhcp-config)#exit
Verification
After configuring the DHCP pools, connect the PCs to their respective networks and verify that they receive IP addresses dynamically from the DHCP server. You can use the ipconfig command on the PCs to check their IP configuration.
By following these steps, you have successfully configured DHCP IPv4 on a Cisco router with two networks. This setup helps in efficient IP address management and ensures that devices in different network segments receive their IP configurations automatically.