Configure Telnet on a Cisco Router with Local Username and Password
In this tutorial, we will walk through the steps to configure Telnet access on a Cisco router using a local username and password. This setup allows administrators to remotely manage the router using Telnet, ensuring secure access through authentication mechanisms. Below, we’ll explain the scenario, the configuration process, and verify the setup.
Scenario Overview
We have a network setup as shown in the topology:
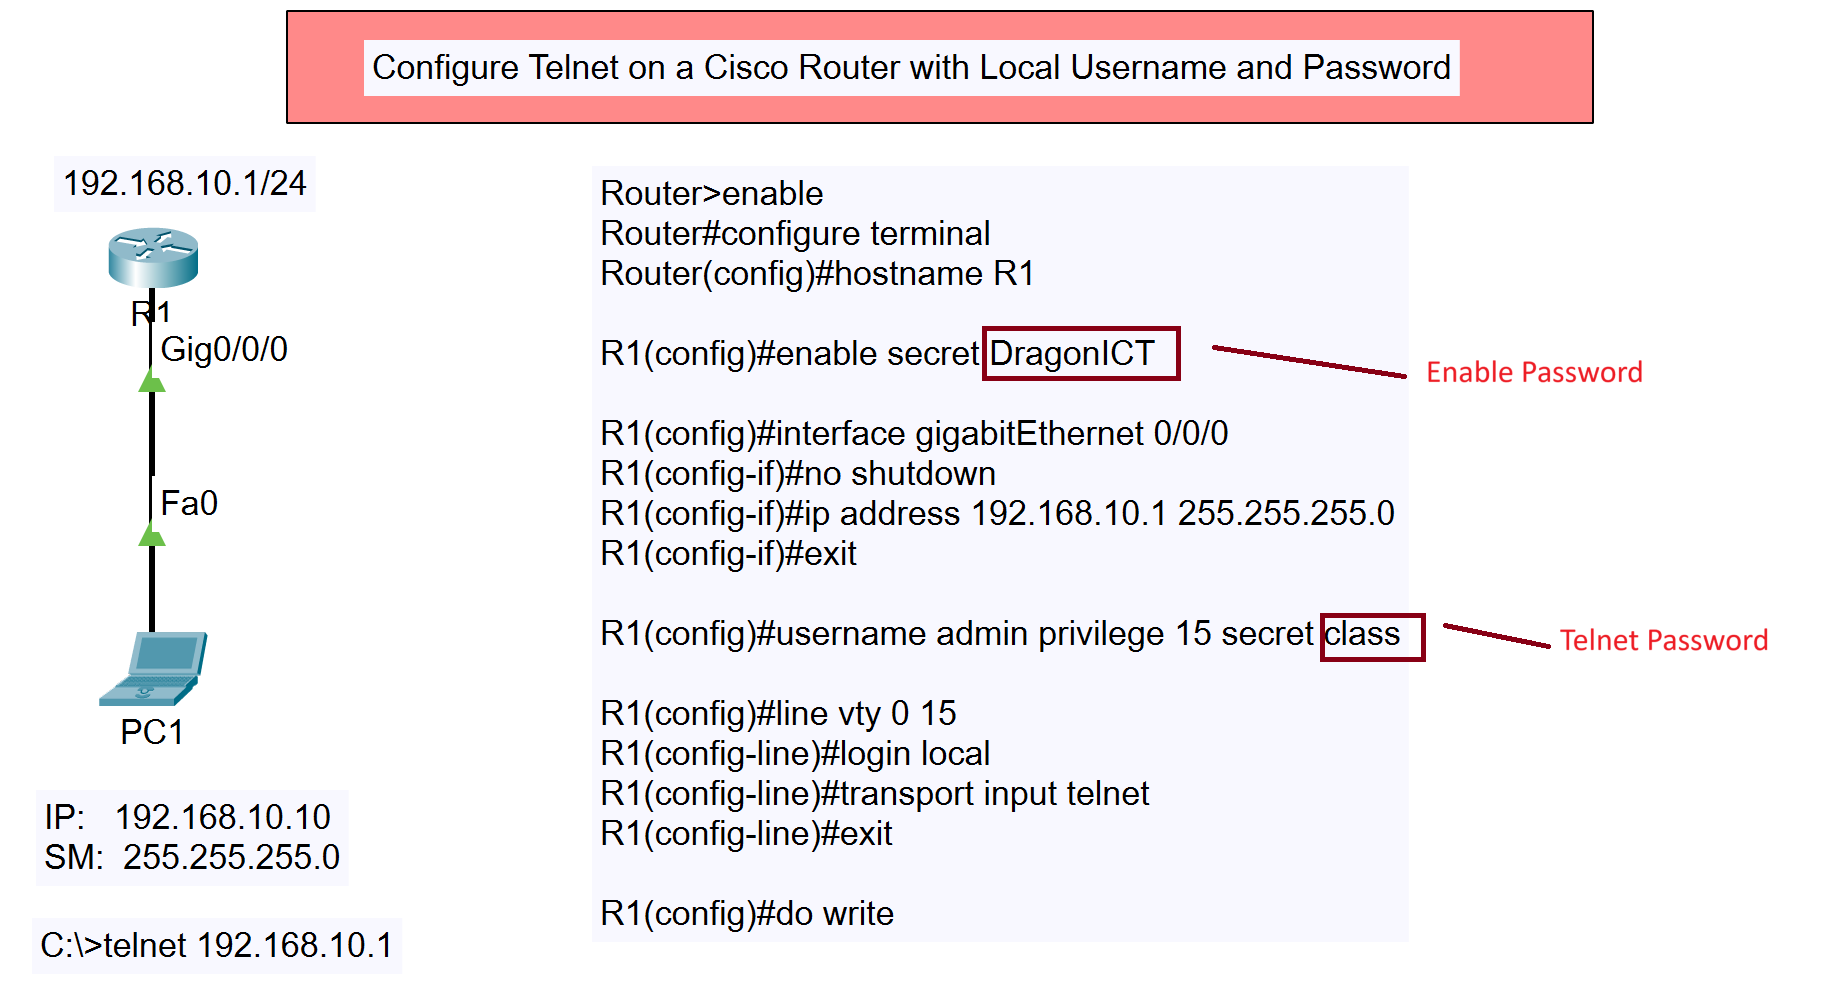
- Router (R1) with IP address 192.168.10.1/24 on interface GigabitEthernet 0/0/0.
- PC1 with IP address 192.168.10.10 and subnet mask 255.255.255.0.
- We will configure the router with a hostname, an enable password, and a local username and password for Telnet access.
Other Types of Telnet Configuration
- Configure Telnet on a Cisco Switch with Only a Password
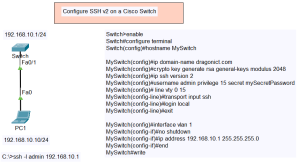
- Configure Telnet on a Cisco Switch with Local Username and Password
- Configure Telnet on a Cisco Router with Only a Password
- Configure Telnet on a Cisco Router with Local Username and Password
Configuration Steps
- Access the Router and Enter Configuration Mode
First, access the router’s CLI and enter privileged EXEC mode by typingenable. Enter global configuration mode withconfigure terminal. - Set the Hostname and Enable Secret
Configure the router’s hostname to identify the device on the network:Router(config)#hostname R1
Set the enable secret password to secure access to privileged EXEC mode:
R1(config)#enable secret DragonICT
Here, “DragonICT” is the password for enabling privileged mode.
- Configure the Interface
Navigate to the interface GigabitEthernet 0/0/0 and assign an IP address:R1(config)#interface gigabitEthernet 0/0/0 R1(config-if)#no shutdown R1(config-if)#ip address 192.168.10.1 255.255.255.0 R1(config-if)#exit
- Create a Local Username and Password
Define a local user with a privilege level and a password:R1(config)#username admin privilege 15 secret class
In this configuration, “admin” is the username, and “class” is the password.
- Configure VTY Lines for Telnet Access
Access the VTY line configuration mode and enable local login:R1(config)#line vty 0 15 R1(config-line)#login local R1(config-line)#transport input telnet R1(config-line)#exit
The command
login localensures that Telnet access is authenticated using the local username and password we set earlier. - Save the Configuration
To save the configuration to the startup configuration, use the following command:R1(config)#do write
Verification
To verify that Telnet access is working correctly:
- Test Telnet Access from PC1
On PC1, open a command prompt and initiate a Telnet session to the router:C:\>telnet 192.168.10.1
You should be prompted to enter the username and password. Use the credentials:
- Username: admin
- Password: class
- Successful Login
If the configuration is correct, you will gain access to the router’s CLI. You can verify that you have successfully logged in by executing a simple command likeshow ip interface brief.
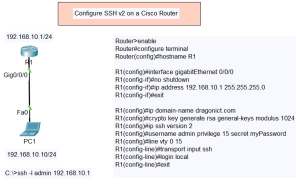
This configuration ensures that only authorized users can remotely access the router using Telnet, providing a secure method for managing the device. Remember that Telnet transmits data in plaintext, so for more secure environments, consider using SSH instead.
By following these steps, you have successfully configured Telnet on a Cisco router using a local username and password, secured access with an enable secret, and verified the configuration through testing.
❤️