Configure Telnet on a Cisco Router with Only Password
Introduction
In this tutorial, we will guide you through the process of configuring Telnet on a Cisco router using only a password. Telnet is a network protocol that allows you to access and manage network devices remotely. For this configuration, we will ensure that Telnet access is secured with a password.
Network Topology
Below is a simple network topology used for this configuration:
- Router R1 connected to a PC (PC1).
- R1’s Interface: GigabitEthernet 0/0/0 with IP address
192.168.10.1/24. - PC1’s IP Address:
192.168.10.10/24.
Other Types of Telnet Configuration
- Configure Telnet on a Cisco Switch with Only a Password
- Configure Telnet on a Cisco Switch with Local Username and Password
- Configure Telnet on a Cisco Router with Only a Password
- Configure Telnet on a Cisco Router with Local Username and Password
Configuration Steps
1. Access the Router and Enter Global Configuration Mode
First, log in to the Cisco router and enter the global configuration mode.
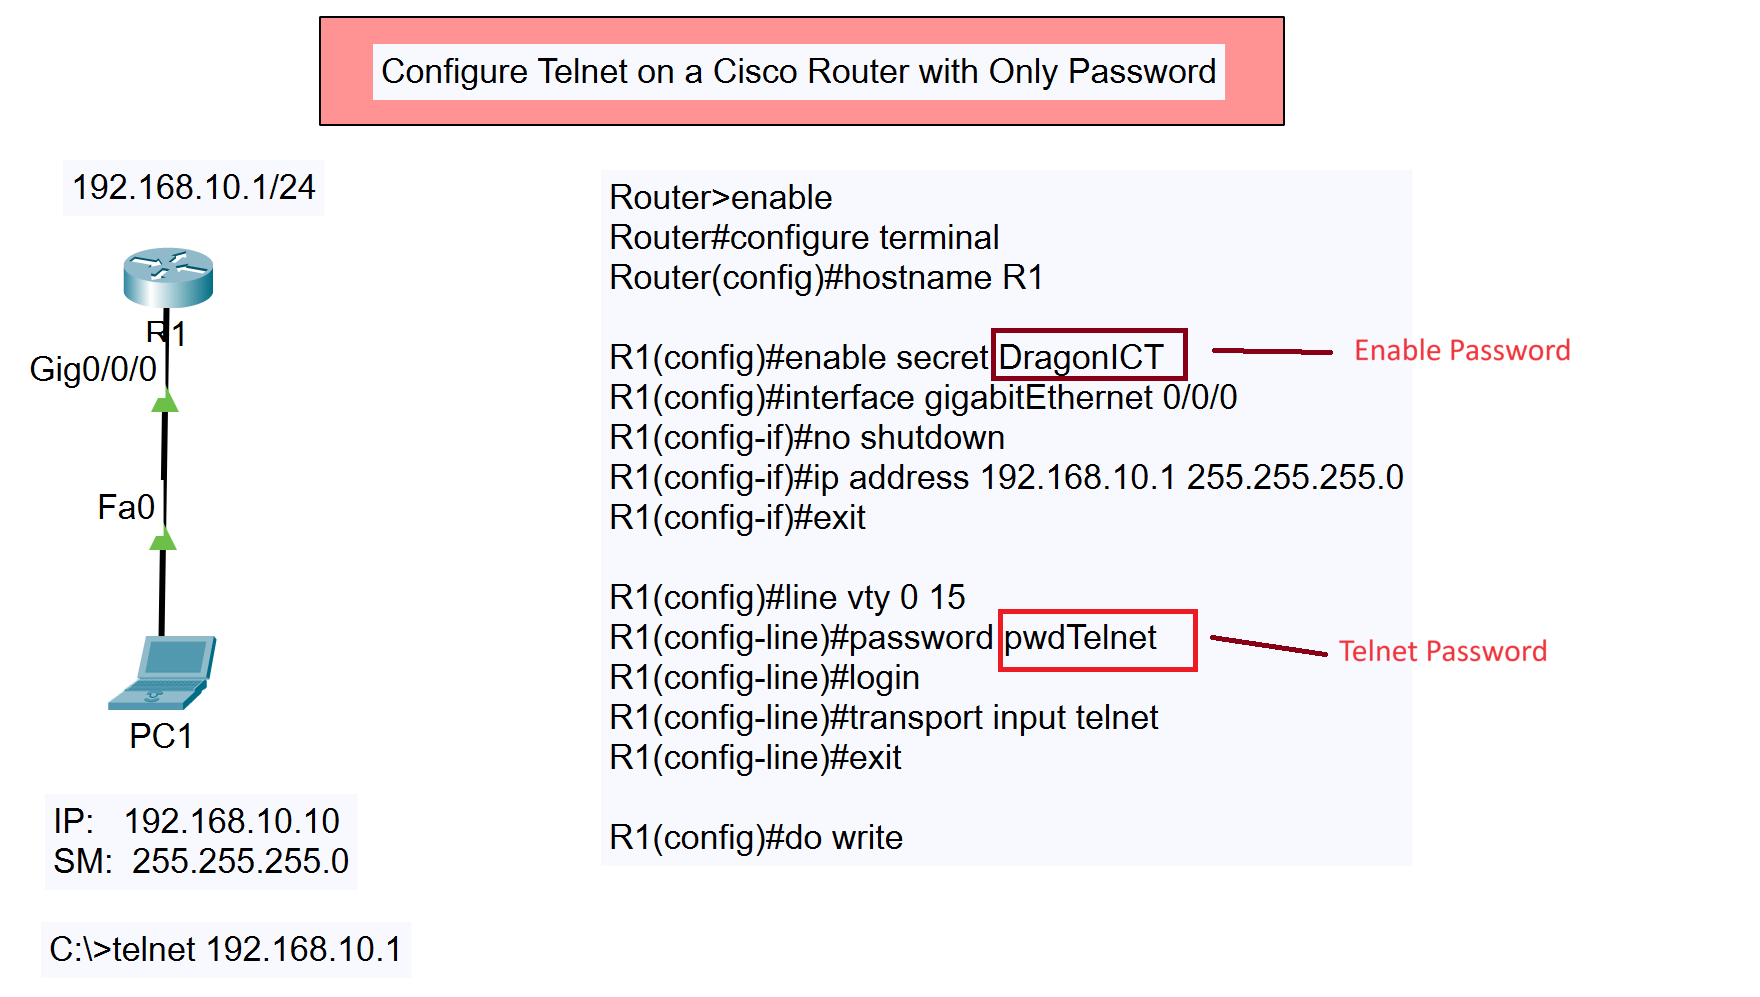
Router>enable
Router#configure terminal
2. Set the Router Hostname
Assign a hostname to the router for easier identification.
Router(config)#hostname R1
3. Set the Enable Secret Password
This password is required to access privileged EXEC mode on the router.
R1(config)#enable secret DragonICT
4. Configure the Interface
Next, configure the router’s interface with the appropriate IP address and bring it up.
R1(config)#interface gigabitEthernet 0/0/0
R1(config-if)#no shutdown
R1(config-if)#ip address 192.168.10.1 255.255.255.0
After assigning the IP address, exit the interface configuration mode.
R1(config-if)#exit
5. Configure Telnet Access
To allow Telnet access, configure the VTY (Virtual Teletype) lines. Set a password for Telnet sessions and enable the login option.
R1(config)#line vty 0 15
R1(config-line)#password pwdTelnet
R1(config-line)#login
R1(config-line)#transport input telnet
R1(config-line)#exit
Here, pwdTelnet is the password that will be required for Telnet access.
6. Save the Configuration
Finally, save the configuration to ensure that the settings are retained after a reboot.
R1(config)#do write
Testing the Configuration
To verify the configuration, use the Telnet command from PC1:
C:\>telnet 192.168.10.1
When prompted, enter the Telnet password (pwdTelnet) to access the router.
Conclusion
You have successfully configured Telnet on your Cisco router using only a password. This setup allows for remote access to the router’s command-line interface while ensuring a basic level of security through the use of a password. For enhanced security, consider using SSH instead of Telnet, as Telnet does not encrypt the data transmitted over the network.