Configure Telnet on a Cisco Switch with Only a Password
Introduction
In this tutorial, we will guide you through the steps to configure Telnet on a Cisco switch using only a password. Telnet allows remote management of network devices, and securing it with a password is crucial to protect your network infrastructure.
Network Topology Overview
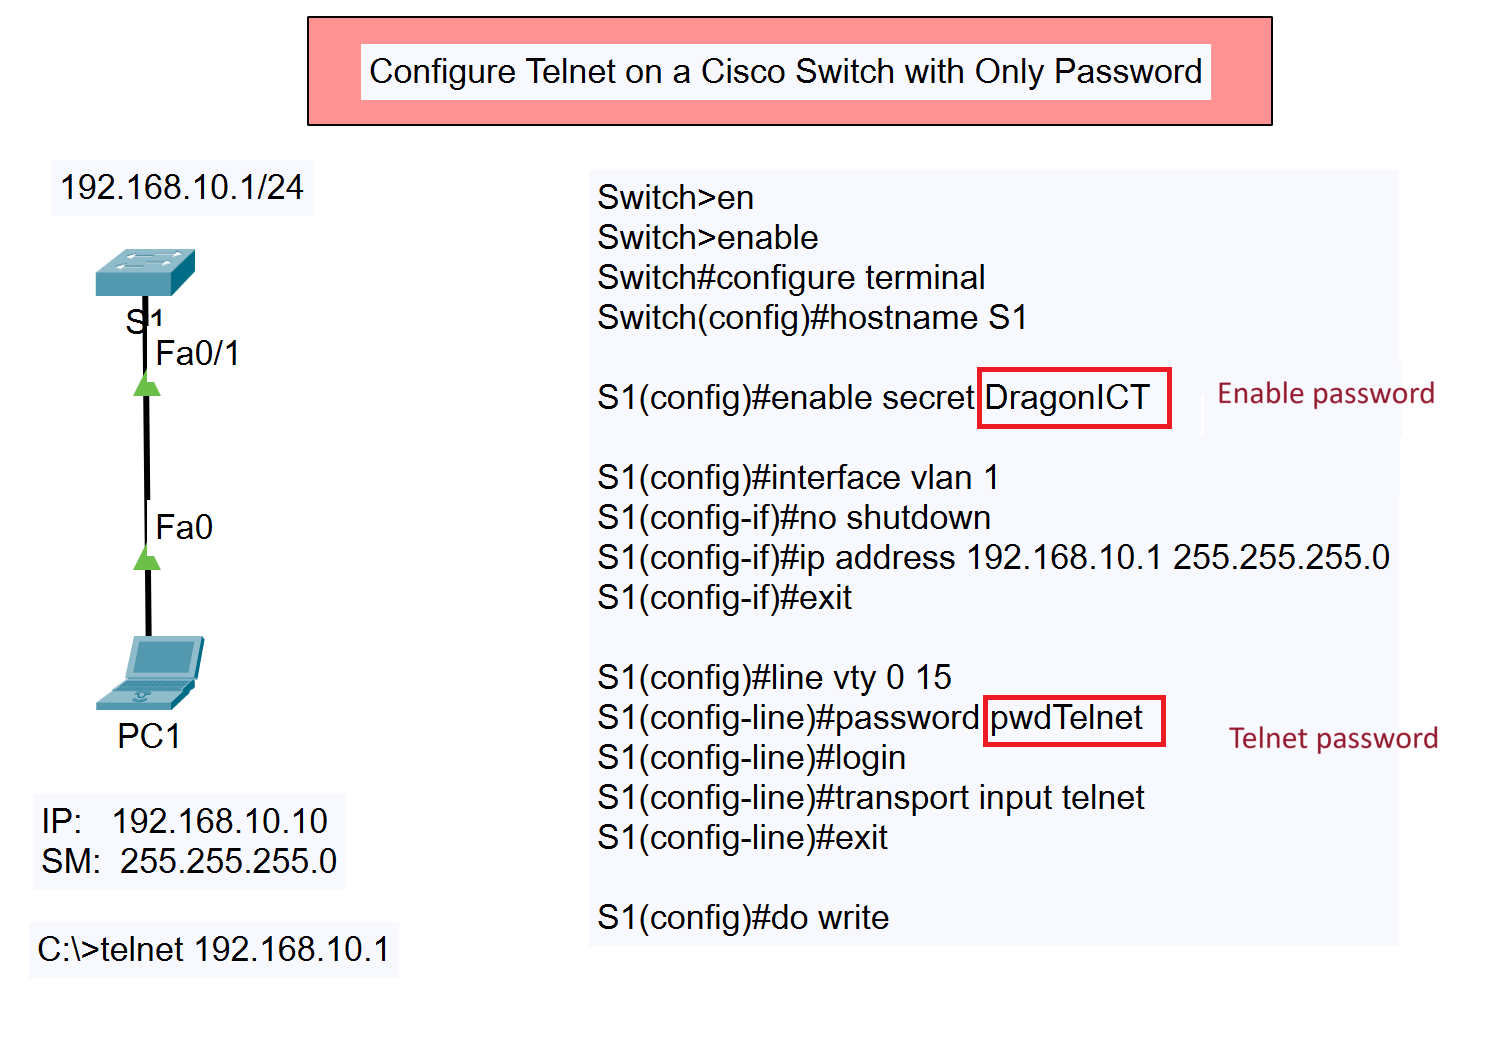
The network topology for this configuration consists of a single switch (S1) connected to a PC (PC1) via the Fast Ethernet interfaces (Fa0/1 on the switch and Fa0 on the PC). The switch has an IP address of 192.168.10.1/24, and the PC is configured with an IP address of 192.168.10.10/24.
Other Types of Telnet Configuration
- Configure Telnet on a Cisco Switch with Only a Password
- Configure Telnet on a Cisco Switch with Local Username and Password
- Configure Telnet on a Cisco Router with Only a Password
- Configure Telnet on a Cisco Router with Local Username and Password
Step-by-Step Configuration
1. Access the Switch:
Start by accessing the switch command line interface (CLI). You can do this by directly connecting to the console port or through an existing remote access method.
Switch>en
Switch#enable
2. Enter Global Configuration Mode:
Enter the global configuration mode to make changes to the switch’s settings.
Switch#configure terminal
3. Set the Hostname:
Change the hostname of the switch to identify it easily.
Switch(config)#hostname S1
4. Configure the Enable Password:
Set a secure password to control access to privileged EXEC mode.
S1(config)#enable secret DragonICT
5. Configure the Management VLAN:
Configure the management interface (VLAN 1) with the appropriate IP address and bring it online.
S1(config)#interface vlan 1
S1(config-if)#no shutdown
S1(config-if)#ip address 192.168.10.1 255.255.255.0
S1(config-if)#exit
6. Configure the VTY Lines for Telnet:
Configure the Virtual Terminal (VTY) lines to allow Telnet access with a password.
S1(config)#line vty 0 15
S1(config-line)#password pwdTelnet
S1(config-line)#login
S1(config-line)#transport input telnet
S1(config-line)#exit
7. Save the Configuration:
Save the configuration to ensure that it persists after a reboot.
S1(config)#do write
Verification
Once the configuration is complete, you can verify the Telnet access by using the following command on the PC:
C:\>telnet 192.168.10.1
You will be prompted to enter the Telnet password (in this example, pwdTelnet). After successfully logging in, you will have access to the switch’s CLI.
Conclusion
By following the above steps, you have successfully configured Telnet on a Cisco switch using only a password. Ensure that you use strong passwords and consider additional security measures such as using SSH instead of Telnet for more secure remote management.